Featured

Millet Bread Loaf (Gluten-Free, Vegan, Oil-free, Refined Sugar-Free, WFPB)

Oil-Free | Refined Sugar-Free | Whole-Food Plant-Based Looking for the easiest gluten-free bread that’s also vegan, oil-free, refined sugar-free, and made with whole ingredients? You’re in the right place. This Millet Flour Loaf Bread is soft, sliceable, and incredibly simple to make—no kneading, no gums, and no strange ingredients required! When I saw a video for this bread on YouTube, I just had to try it! I'm so glad I did.   Perfect for sandwiches, toast, or slathered with your favorite nut butter, this recipe is a game-changer for gluten-free and whole food plant-based eaters. 🌾 Why Millet Flour? Millet is an ancient grain that’s naturally gluten-free, mild in flavor, and packed with nutrients like magnesium, iron, and fiber. It also happens to make a fantastic flour for baking when used correctly—giving you a tender crumb without the dense texture common in many gluten-free loaves. ✅ What Makes This Bread Special? 100% Gluten-Free – Made entirely with mille...
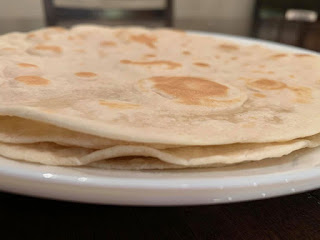
Homemade Flour Tortillas 3

Homemade tortillas are so much more delicious than the store-bought ones. I don't know why I don't make them more often - they're not really that hard. The worst part is the rolling but if you're only making one batch, it's not so bad. You could certainly just take some additional time and make a whole bunch to keep in the freezer.


Homemade Flour Tortillas 3
Original recipe from The Klutzy Cook
Makes 10 tortillas

Ingredients
  • 3 cups all purpose flour
  • 1 teaspoon salt
  • 3 tablespoons oil (I used avocado)
  • 1 cup of warm water
Directions
  1. Combine flour, salt and oil in a bowl with your fingertips.
  2. Slowly stir the water into the flour mixture with your hands.
  3. Continue adding the water until a ball forms and the dough is no longer sticky. You want to make sure it isn't dry enough to crack either. You really want it to be smooth. 
  4. Knead the dough for a few minutes using some flour to dust your surface if needed.
  5. Divide the dough into 10 balls (you could make them bigger or smaller if you wish).
  6. Cover (so they don't dry out) and allow the dough to rest for 15-60 minutes while you do other things. 
  7. Roll each ball into a disk as flat and large as you want your tortillas to be. Keep the rest of them covered so the balls don't dry out while they're waiting for their turn.
  8. Heat a non-stick pan (I used my crepe pans) over medium low heat.
  9. Place the rolled tortilla into the heated pan and keep your eyes on it. Once you see it start to bubble on top it's time to flip. The bottom should be golden. Cook the other side for a minute or two until it turns golden and then transfer to a plate. Repeat for the rest of the tortillas.
  10. Store these in an airtight container until you're ready to use them (for up to 3 days), or freeze them for later use.


Comments

Popular Posts